
- SAP Community
- Products and Technology
- CRM and Customer Experience
- CRM and CX Blogs by SAP
- Concept and PoC of a Simple Forms Solution for Ema...
CRM and CX Blogs by SAP
Stay up-to-date on the latest developments and product news about intelligent customer experience and CRM technologies through blog posts from SAP experts.
Turn on suggestions
Auto-suggest helps you quickly narrow down your search results by suggesting possible matches as you type.
Showing results for
Advisor
Options
- Subscribe to RSS Feed
- Mark as New
- Mark as Read
- Bookmark
- Subscribe
- Printer Friendly Page
- Report Inappropriate Content
12-22-2023
9:58 AM
Introduction
As I described in my previous post 'Landing Pages and Forms: Definition and Requirements' the forms feature of Emarsys is not perfect. I also highlighted that many customers have their own content management system they want to use for landing pages and just need a simple way of embedding forms.
In this article I describe how this could be achieved (including progressive profiling) with some custom code using node.js, javascript and CSS.
Concept Overview
Basic Idea
As a starting point I accepted the fact that customers will use their CMS of choice. With this in mind I needed to find an easy way for campaign or content managers to embed a form on any page. Since most CMS offer a way to include a custom HTML block I had the idea to offer a simple snippet with a minimum set of parameters:
<div id="ems-form" fields="1,2,3*" button="Register Now!" eventID="24606"></div>
A javascript program which has to be installed somewhere in the CMS then would find the snippet with the ID "ems-form" and evaluates the rest of the parameters:
- fields: A comma-separated list of Emarsys contact field IDs to be used in the form with mandatory fields marked with an asterisk (*)
- The labels are then loaded via the API using English as the default language. (An optional parameter 'lang' can be used to take a different language)
- Also the type (text, checkbox or single choice / dropdown) is read via API including any code list values for dropdown fields.
- button: The text on the button
- eventID: The ID of an external event that would be created to allow for follow-up processes using an automation program
The form code is then generated at the same location as the snippet. If the page is called with the URL parameter 'UID' and the UID value of an existing contact then all fields are pre-filled with existing values where possible by calling the Emarsys API. Upon press of the button the contact is updated or created in Emarsys and an external event ist created for that contact via API.
There is also a CSS file which is installed on the CMS which contains the basic styling. If you need to adapt some styling specifically to your page you can just append it at the end of your snippet. For example to change the button color:
<div id="ems-form" fields="1,2,3*" button="Register Now!" eventID="24606"></div>

<style>

#ems-form button {background-color: darkcyan;}

</style>
Proxy Server
There are 2 issues when you want to call the Emarsys API from Javascript code within any web page:
- If you want to call an API across different domains then a security mechanism called CORS usually prevents this. Unfortunately you cannot define an allowlist of domains inside Emarsys to allow specific domains.
- Since you don't want your landing page visitors to sign in with credentials for the API call you need some way to make unauthorized calls for a specific set of API endpoints.
The solution for this is a proxy server where you set the response headers so that the CORS issue is resolved. Additionally you specify certain endpoints including authorization that are needed for the form communication (and only those). Additionally some way of rate-limiting should be implemented against denial of service attacks.
Extensions
While the basic setup of the snippet already facilitates a lot of simple use cases like for example newsletter subscriptions or download requests I found a lot of more complex use cases for which I added additional optional features. In many cases there are already default parameter values in the javascript coding which can be adapted centrally so that the end user only has to provide them if needed.
Overwriting Default Labels
While many fields already have a good text returned from the API some label text might not be sufficient. For example, the text for the email opt-in is just 'Opt-In'. Usually you want to give the visitor of the landing page a better description of what that flag means like: 'Please send me regular product information via email.'
So I added a generic parameter with the prefix 'label_' followed by the ID of the field. This will overwrite the default label text. In my example this looks like:
<div id="ems-form"

  fields="3*,31"

  label_31="Please send me regular product information via email."

  button="Register Now!"

  eventID="24606"

></div>
Button Control
Additional parameters to control the button and submit behavior:
- success:
- Change the message after successful submit (default: "Success!")
- If the given message starts with 'http' then that URL will be opened after a successful submit
- error: Change the message after successful submit (default: "Error!")
- keepButtonAfterSubmit: The default behavior after a successful submit is that the button will be hidden to avoid a double submit. If you set this parameter (with no value) then the button remains active
<div id="ems-form"

  fields="1,2,3*"

  button="Register Now!"

  keepButtonAfterSubmit

  success="Thank you!"

  error="Oh, very sorry - something went wrong!"

  eventID="24606"

></div>
Progressive Profiling
This is a method to continuously increase the information you have for an any given contact but not overloading the forms with a high number of fields which usually leads to a low submit rate. The concept here is to define a list of wanted fields in a ranked order. After loading the landing page and before displaying the form the system checks on the first field and if that field is not known for that contact the field is added to the form. Then it continues with the next fields in line until a maximum number of progressive fields is reached. These are the new or enhanced parameters:
- fields: Here you can add a question mark (?) in your comma-separated list indicating the position where the progressive fields are to be inserted. All other fields here will always be shown no matter if they are already known or not.
- progressive: A comma-separated list of contact IDs (similar to the fields parameter) which defines the order in which the fields are checked. It should be optional for the user to provide this list since the progressive fields should be the same for any of the forms. Therefore there is a default in my coding which can be adapted to the company's requirements
- progressive-max: The maximum number of progressive fields inserted in the form
<div id="ems-form"

  fields="?,31"

  progressive="3*,1,2,46,14,5,37,10,11"

  progressive-max="2"

  button="Register Now!"

  eventID="24606"

></div>
Personalization Tokens anywhere on the Page
Since you probably already use personalization tokens in your emails which include a link to your landing pages it would be good to have those inside your landing page as well. That way you can continue your personalized conversation with your contact on the landing page.
I decided to build a simplified but similar version of the ESL which you already know from the Emarsys email content.
- Similar to email content the token starts and ends with double curly braces {{...}}.
- The script then searches for anything like 'contact.#' where # is the ID of a contact field. If the field contains a value for the given contact then the entire text is inserted in the landing page with contact.# replaced by its value. Only one field inside the curly braces is allowed!
- You can add an optional default text at the end separated by a pipe (|) symbol. This text is used if the contact field is empty
- If the field is a dropdown then the label of the field value is used instead of the key.
- This also works for snippet parameters (e.g. success, error, button)
Examples:
{{Dear contact.1|Invitation}}
- contact.1 exists: 'Dear John'
- Otherwise: 'Invitation'
{{A confirmation will be sent to contact.3 after your registration}}
- contact.3 exists: 'A confirmation will be sent to john.doe@email.com after your registration'
- Otherwise: Nothing will be inserted
success="Thank you{{, contact.1}}!"
- contact.1 exists: The success message will be 'Thank you, John!'
- Otherwise: The success message will be 'Thank you!'
Flex Styling Layout
Sometimes you'll want to have a lot of fields on your form, for example if you use the form as a profile page (See respective use case in the demo section). For such cases I added the snippet parameter 'flex' which will result in a 2-column layout of the fields with the following exceptions:
- Email address and postal address: Keep 100% width
- Salutation: 20% width
- First name: 30% width
- Any checkbox: Fixed width of 150px
Of course this can be adjusted by editing the CSS file for the forms.
Form Templates
I encountered 2 use cases which I could enable by introducing custom form templates:
- Include sub-titles inside the form
- Add event-specific form fields which will be added to the external event's data section. This provides much more flexibility in a follow-up automation flow (see use case 'Conference Registration' below)
To enable these templates you need to include another DIV element inside the snippet DIV with the ID 'ems-form-templates' and the style 'display:none'. Then you can add any number of HTML elements below with a unique ID like 't1' or 'e1'. Additionally you need to embed these IDs inside the fields parameter. If you want to add a field for the data section of the external event then you need to give it an ID and name starting with 'event_'.
The example below first adds a sub-title 'Personal Data' followed by a maximum of 2 progressive fields. Then it adds another sub-title 'Additional Data' followed by a field labeled 'Additional Field 1':
<div id="ems-form"

    fields="t1,?,t2,e1"

    progressive-max="2"

    button="Register Now!"

    eventID="29670" >


    <!-- Form Templates -->

    <div id="ems-form-templates" style="display: none">

        <h3 id="t1">Personal Data</h3>

        <h3 id="t2">Additional Data</h3>

        <div id="e1" class="form-input">

              <label for="event_field1">Additional Field 1</label>

              <input id="event_field1" name="event_field1">

         </div>

    </div>


</div>
After submitting the form the external event will have the following data section:
"data": {"field1": "YOUR-INPUT-IN-THE-FORM"}
Components
Here are the main components:
- Emarsys API:
- Create new contact
- Get data of a given contact
- Update data of a given contact
- Create external event to trigger follow-up processes
- Proxy server (node.js)
- Provide authorized access to specific Emarsys API endpoints (see above)
- Set the CORS header to prevent cross-origin ressource issue
- Javascript
- Parse snippet
- Evaluate progressive profiling
- Call API via proxy server
- Stylesheet/CSS:
- Provide basic styling
- Context-specific styling
- CMS system which allows
- Embedding or linking javascript and CSS in any content
- Embedding of plain HTML in the content
Proof of Concept - Demo
To create my PoC I chose Wordpress as a CMS system with some plugins (No endorsement intended):
- WPCode: Embed javascript or CSS code st specific locations of pages
- Elementor: A nice and intuitive content manager with the ability to embed custom HTML snippets
Simple Registration
Just to show the bare minimum scenario here is a very simple snippet for a form aimed at new customer acquisition:
<div id="ems-form"

    fields="1,2,3*"

	button="Register Now!"

	eventID="24606"

></div>
Below you see the content in editor mode with the snippet section active (purple frame on the right side). To the left you see the editor with the form snippet. Note that there is also a visual indication of a form in the content area.
This is what an anonymous visitor will see: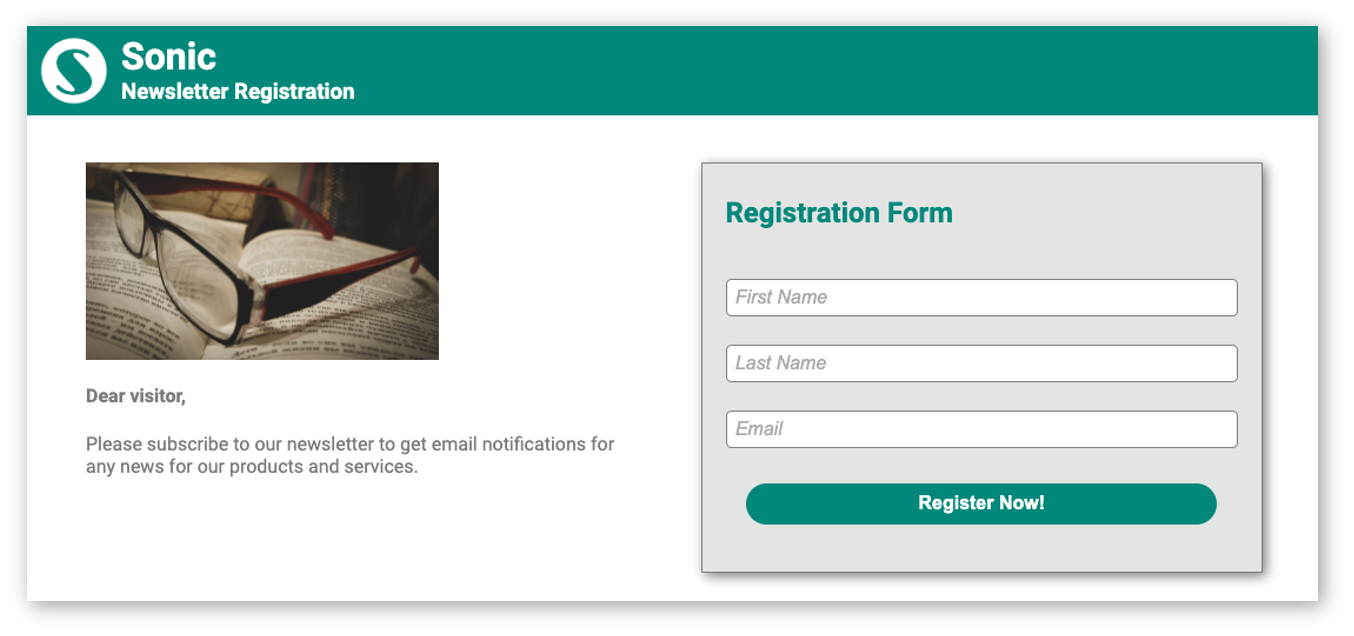
In a more useful variant you would also include progressive profiling and page personalization. The snippet looks like this:
<div id="ems-form"

    fields="?"

    progressive-max="2"

	button="Register Now!"

	eventID="24606"

></div>
And here is the page editor:
This is what an anonymous visitor will see:
And here you see an example of a known visitor. The default progressive field list is '3*,1,2,46,14,5,37,10,11'. Since the email address, first and last name are already known the system chooses the salutation (ID=46) and country/region (ID=14). Also please note the personalized text on the left side of the page:
Profile Page
In this example of a profile page you see several other parameters in action: The flex-based multi-column layout, the label overwrite and changes on button behavior:
<div id="ems-form"

    flex

    fields="3*,46,1,2,14,4,37,90090,10,31,4529"

    label_31="Email Opt-In"

    Button="Save your data"

    keepButtonAfterSubmit

    success="Thank you{{ contact.1}}, your changes have been saved."

    error="Sorry{{ contact.1}}, something went wrong - please try again later.">

</div>
Here is the page editor again:
And this is the page after a successful submit:
Conference Registration
This is a more complex scenario which also includes an automation program on Emarsys side to react on the external event created by the form including decisions based on data of the external event. I will not describe the whole process in detail but to give you more context I give you a short outline:
- Landing page with form:
- Ask for progressive fields (optional)
- Ask to register for a specific conference (3 options) or cancel a registration (required)
- Give the option to schedule an expert meeting
- Asks for dietary needs - this is not an event field but a custom contact field created for this scenario.
- Ask for marketing permissions (optional)
- Emarsys automation program:
- Triggered on the external event sent by the form above. The data of the external event passed from the form will control some decision nodes.
- In case of conference registration (no cancellation):
- Send confirmation email including the data of the registered conference and an optional content block if an expert meeting had been requested
- Checks for the specific conference:
- Adds the contact to an attendee contact list of the specific conference.
- If an expert meeting had been requested:
- Add contact to a contact list for expert meetings for the specific conference
- Create a task in SAP Sales Cloud to notify sales on the request for an expert meeting for that specific conference
- In case of cancellation:
- Send cancellation confirmation email
- Remove contact from all contact lists
- If expert meeting had been requested: Create a task in SAP Sales Cloud to inform sales about the cancellation
Below you see the form snippet which includes several additional form templates:
- Sub-titles for personal data (t1), event data (t2) and permissions (t3)
- Additional fields for the external event:
- Drop-down for the conference (e1, event_conference). This is a dropdown for 3 specific conference locations/dates and the cancellation option.
- Checkbox for the optional expert session (e2, event_conferenceAppointment).
<div id="ems-form"

eventID="29670"

fields="t1,?,t2,e1,90090,e2,t3,31,4529"

progressive-max="2"

label_31="Please send me regular product information via email."

label_4529="Please notify me via SMS on important product updates."

button="Register Now!"

keepButtonAfterSubmit

success="Thank you{{ contact.1}}!"

>


<div id="ems-form-templates" style="display: none">

    <h3 id="t1">Personal Data</h3>

    <h3 id="t2">Event Data</h3>

    <h3 id="t3">Permissions</h3>

    <div id="e1" class="form-input">

        <label for="event_conference">

            Conference Location and Date

        </label>

        <select id="event_conference" name="event_conference" required>

            <option></option>

            <option value="2023-05-04_SFR">

                 San Francisco (May 4, 2023)

            </option>

            <option value="2023-06-08_LON">

                 London (June 8, 2023)

            </option>

            <option value="2023-07-11_SIN">

                 Singapore (July 11, 2023)

            </option>

            <option style="background: #c9c9c9; font-size: 0.1px;" disabled>

                ----------------------------

            </option>

            <option value="CANCEL">

                 Cancel all Registrations

            </option>

        </select>

    </div>

    <div id="e2" class="form-input" style="margin-top: 10px">

        <table class="checkboxTable">

            <tbody>

                <tr>

                    <td class="checkboxColumn">

                      <input type="checkbox" id="event_conferenceAppointment" name="event_conferenceAppointment">

                    </td>

                    <td>

                      <label for="event_conferenceAppointment">I would like to schedule an expert appointment.</label>

                    </td>

                </tr>

            </tbody>

        </table>

    </div>

</div>
Here you see the page editor
And this is the page for a known visitor:
And to complete the story here you see examples of the emails. I used the following elements to personalize based on the event payload:
- ESL script inside the email
{% if event.conference == "2023-05-04_SFR" %}
in San Franzisko on May 4, 2023
{% elseif event.conference == "2023-06-08_LON" %}
in London on June 8, 2023
{% elseif event.conference == "2023-07-11_SIN" %}
in Singapore on July 11, 2023
{% endif %}
- I used a special content block in the template which only appears if the event data field 'conferenceAppointment' (Expert session) is true:
<!-- {% if event.conferenceAppointment == "true" %} -->
<tr e-repeatable-item>
...
</tr>
<!-- {% endif %} -->
Note that I also used on-behalf personalization with data from the sales rep responsible for Jenny's company (See SAP Emarsys Account Engagement Add-On). Here you see the tasks in SAP Sales Cloud:
And finally a glimpse of the automation program involved:
Example Code?
So, where is the code? I was thinking to provide my current code here as well but it is not yet in the state in which I can present it. I would need to do some clean up and insert a lot more comments. So I rather wait for some feedback and decide later if I will put something out for the community.
If I will post something like that it would of course come with a BIG disclaimer 😉
Conclusion
After reading this post you should be able to understand my concept of a snippet-based form for Emarsys and hopefully provide feedback on it.
I am aware that the coding might be intimidating for an end user, especially for the more complex use cases. But an administrator could provide some predefined snippets just for copy and paste to make it easier. Maybe some CMS might also have the option to prepare specific building blocks which could be used to hide the code from the user.
- SAP Managed Tags:
- SAP Emarsys Customer Engagement
Labels:
1 Comment
You must be a registered user to add a comment. If you've already registered, sign in. Otherwise, register and sign in.
Labels in this area
-
Business Trends
270 -
Business Trends
10 -
chitchat
1 -
customerexperience
1 -
Event Information
256 -
Event Information
18 -
Expert Insights
30 -
Expert Insights
49 -
Life at SAP
133 -
Life at SAP
1 -
Product Updates
666 -
Product Updates
25 -
SAP HANA Service
1 -
SAPHANACloud
1 -
SAPHANAService
1 -
Technology Updates
453 -
Technology Updates
15
Related Content
- Get and Stay Certified for Customer Experience Certifications in CRM and CX Blogs by SAP
- Is your organization ready for a marketing transformation? in CRM and CX Blogs by SAP
- What is planned for the 2405 release of SAP Variant Configuration and Pricing? in CRM and CX Blogs by SAP
- SAP MaxAttention Innovation Workshop 'Accelerate Clean Core Journey' (March 19, 2024) in CRM and CX Blogs by SAP
- Introduction to Permission Marketing in CRM and CX Blogs by SAP
Top kudoed authors
| User | Count |
|---|---|
| 2 | |
| 1 | |
| 1 | |
| 1 | |
| 1 | |
| 1 | |
| 1 | |
| 1 | |
| 1 | |
| 1 |