
- SAP Community
- Products and Technology
- Human Capital Management
- HCM Blogs by Members
- INSTALLATION OF SAP ENABLE NOW MANAGER ON SQL SERV...
Human Capital Management Blogs by Members
Gain valuable knowledge and tips on SAP SuccessFactors HCM suite and human capital management market from member blog posts. Share your insights with a post of your own.
Turn on suggestions
Auto-suggest helps you quickly narrow down your search results by suggesting possible matches as you type.
Showing results for
former_member68
Participant
Options
- Subscribe to RSS Feed
- Mark as New
- Mark as Read
- Bookmark
- Subscribe
- Printer Friendly Page
- Report Inappropriate Content
06-29-2020
2:49 PM
Overview
The SAP Enable Now Manager serves as a central content management and collaboration platform, simplifying the teamwork of authors. Additionally, it is possible to publish content for specific target groups depending on roles and users as well as measuring the success of the training.
The Manager is a Server Application which runs on the Apache Tomcat Application Server with writing data to a database server and to a server sided file storage. Due to these dependencies, the installation of the Manager needs third-party applications to be installed in advance.
Identification

System Requirements
The following minimum hardware configuration is required for running the application server.

Dependencies
The package has dependencies:

A. DOWNLOAD JAVA RUN TIME from the below link. And Install it.
https://www.oracle.com/java/technologies/javase-downloads.html
B. DOWNLOAD MICROSOFT VISUAL C++ Package for VS 2013 from below link. And Install it.
https://www.microsoft.com/en-us/download/details.aspx?id=40784
C. Apache Tomcat Installation will be covered in the Installation Process Steps.
D. If your Operating System don’t have an inbuilt SQL Server, then use the below link to install SQL Server.
https://www.tutorialspoint.com/ms_sql_server/ms_sql_server_installation.htm
INSTALLATION PROCESS BEGINS
Process Steps
Step1 : Select the Operating System as per the System Requirements.
Step 2 : Download the SAP ENABLE NOW MANAGER files from the package CONSUMPTION EDITION 1.0 shown as below.

- Select the below Version.

- Under this zip file, you will get a “.war” file which is the file we are looking for. And this is the main component of SAP ENABLE NOW, named as MANAGER. In our case, we are taking Microsoft Edition i.e. Manager on SQL.

Step 3: In order to deploy this “WAR file”, we need Apache Tomcat which you can download from the below link.
Apache Tomcat:- https://archive.apache.org/dist/tomcat/tomcat-8/v8.5.11/bin/
- Select the file as marked below.

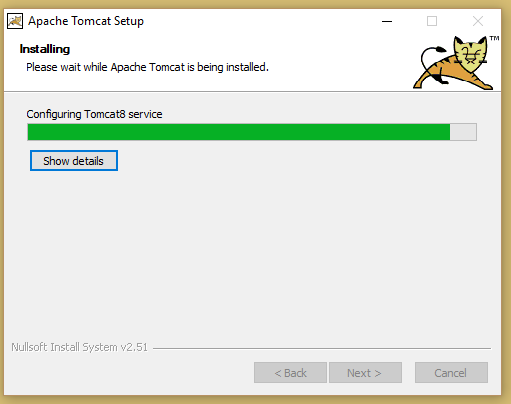
Step 4: Next Step is to install apache-tomcat-8.5.11.exe and configure it.
- Run as administrator and follow the steps below.


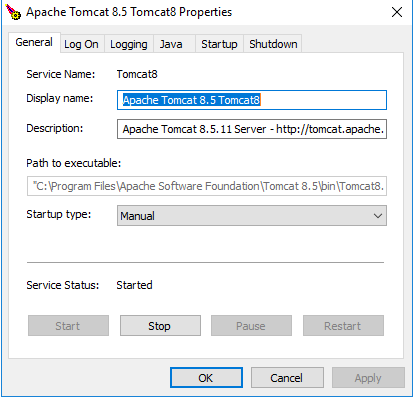
Configuration
Set Tomcat service startup to Automatic from default.

Step 5: Change the file size in Apache Tomcat before deploying the WAR file.
![]()
- Find the webapps folder in the Tomcat installation directory.
- Open manager.
- Open WEB-INF.
- Open the file web.xml in your favorite text editor application.
- Change the value for <max-file-size> and following parameter <max-request-size> from current 52428800 (50MB in Byte) to a higher value fitting the installer size at minimum, e.g. 167772160 (160MB).
- Save the file and close it.

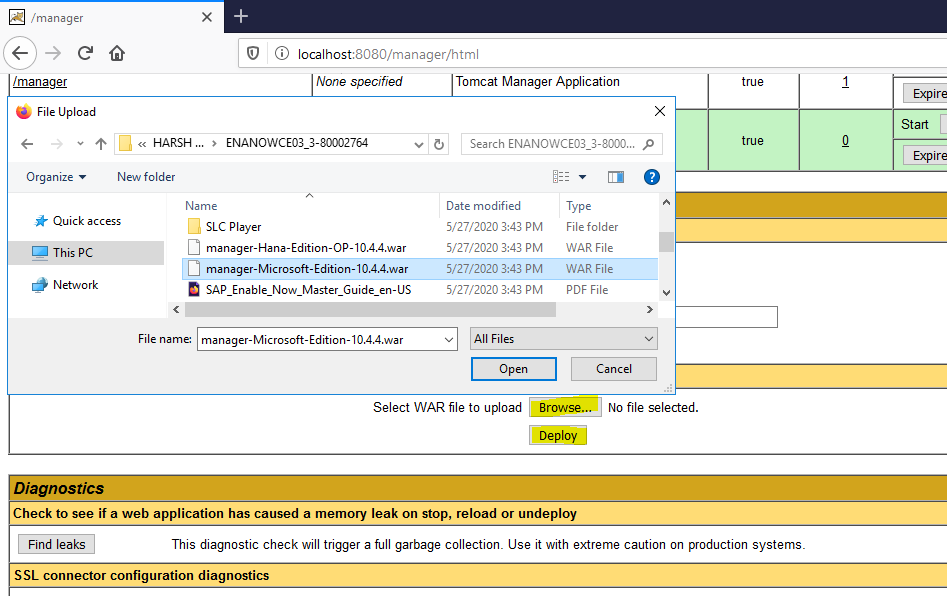
Step 6: Now, we need to deploy the WAR file through Apache Tomcat. Follow the process below.
- Open your favorite Browser.
- Go to :- http//:localhost:8080
- Select the Manager App.

- Sign in with credentials you mentioned while installing Apache Tomcat.

- Click Browse, Select the WAR file and Deploy.
- Now you get the Path in the list of applications. Open the Path.

- Open this link, it will ask for the Credentials. Now, the tricky part is finding out its credentials. You will get it here.
![]()
This PC--> Windows(C)-->Program Files-->Apache Software Foundation-->Tomcat 8.5-->webapss-->manager-Microsoft-Edition-10.4.4-->WEB-INF-->classes
- Under directory classes, you will get config.properties (Get your Credentials from here).
Step 7: After Signing in, you are about to configure your SAP Enable Now Manager.
- Fill the required details as below.

- Create a new database and select database path. Click Next Steps.

- Fill the required details to set E-mail Notifications.

- Fill Super Admin details.
Initial Workarea
Specify the display name* which will be shown in initial arranged Workarea. You should define a clear allocable short variant of that name, without spaces, in the field Workarea ID*, for example wa for Workarea.Specify the name of the root group in initial arranged Workarea by entering the field Root Group (Display Name)*.
Initial Configuration
In field SSO Keytab Files Folder enter the path to your local storage where keytab files, as needed for single sign-on, shall be stored. You can enter or edit this settings later in the server settings.

- In step Install Content you get the opportunity to upload predefined sceneries to the Manager. This functionality is for development and testing purposes only. Please click Next step to proceed with the installation process.

- The window Finished informs you about completion of the install process.

SUPER ADMIN LOGIN

HOME PAGE

INSTALLATION PROCESS AND CONFIGURATION IS DONE NOW.
IN CASE, YOU NEED MORE UNDERSTANDING TO THE PROCESS. YOU HAVE ALREADY DOWNLOADED THE MASTER GUIDE FOR IT. YOU CAN FIND AS BELOW.


- For other configuration in Tomcat like performance optimization or change of port, you can refer this guide.
STARTING AND STOPPING OF MANAGER AND ITS DATABASE
- START SQL SERVER


- START APACHE TOMCAT
Conclusion
SAP Enable Now Manager is successfully installed. Now, you can manage your Work areas through its Desktop Components- Producer & Instant Producer. You can find the setup files for these in the Downloaded Folder. Make sure, you have Microsoft Office installed which is a prerequisite for these Desktop Components.
I have come to the end of this Blog Post. Hope this will be beneficial for you. You can also share your comments or feedbacks.
- SAP Managed Tags:
- SAP Enable Now,
- SAP Enable Now, author option
10 Comments
You must be a registered user to add a comment. If you've already registered, sign in. Otherwise, register and sign in.
Labels in this area
-
1H 2024 Product Release
5 -
2H 2023 Product Release
1 -
Absences-Only Time Recording in SAP SuccessFactors
1 -
ACCRUAL TRANSFER
1 -
Advanced Workflow
1 -
AI
1 -
AI & Skills Ontology
1 -
Alerts for National ID Information portlet: Full step-by-step guide
1 -
Alerts for Payment Information: Full step-by-step guide
1 -
Anonymization
1 -
API and Integration
1 -
Auto Delegation on the Leave Request (Time Off) Screen
1 -
BTP
1 -
Business Rules
2 -
Calibrating with Performance Form Data
1 -
Canvas Report
1 -
Career Development
1 -
Certificate-Based Authentication
1 -
Cloud Identity Services
1 -
Cloud Platform Integration
1 -
Common Super Domain
1 -
Compensation
1 -
Compensation Information Management
1 -
Compensation Management
1 -
Compliance
2 -
Content
1 -
Conversational AI
2 -
CSD
1 -
Custom Data Collection
1 -
Custom event
1 -
custom portlet
1 -
Data & Analytics
1 -
Data Integration
1 -
Dayforce
1 -
deep link
1 -
deeplink
1 -
Delimiting Pay Components
1 -
Deprecation
1 -
EC Payroll
1 -
Employee Central
1 -
Employee Central Global Benefits
1 -
Employee Central Integration (Inc. EC APIs)
1 -
Employee Central Payroll
2 -
employee profile
2 -
Employee Rehires
2 -
external terminal
1 -
external time events
1 -
Generative AI
2 -
Getting Started
1 -
Global Benefits
1 -
Goals
1 -
Guidelines
1 -
h12024
1 -
H2 2023
1 -
HCM
1 -
HR
2 -
HR Data Management
1 -
HR Transformation
1 -
ilx
1 -
Incentive Management Setup (Configuration)
1 -
Integration Center
3 -
Integration Monitoring
1 -
Integration Suite
1 -
Intelligent Services
1 -
internal mobility
1 -
Introduction
1 -
Learning
3 -
LMS
2 -
LXP
1 -
Managing Pay Scale Progression based on Age (or) Service Period
1 -
Massively MDF attachments download
1 -
Mentoring
1 -
Metadata Framework
1 -
Middleware Solutions
1 -
OCN
1 -
ODATA
1 -
OData APIs
2 -
ONB USA Compliance
1 -
Onboarding
2 -
Opportunity Marketplace
1 -
Pay Component Management
1 -
PCE
1 -
Performance & Goals
1 -
Performance Form
1 -
Performance Forms
1 -
Platform
1 -
portlet
1 -
POSTMAN
1 -
Predictive AI
2 -
Recruiting
1 -
recurring payments
1 -
RISE PCE
1 -
Role Based Permissions (RBP)
2 -
S4 HANA On-Premise
1 -
SAP Build CodeJam
1 -
SAP Build Marketplace
1 -
SAP CPI (Cloud Platform Integration)
1 -
SAP HCM
1 -
SAP HCM (Human Capital Management)
3 -
SAP HCM ECC
1 -
SAP HR Solutions
2 -
SAP Integrations
1 -
SAP release
1 -
SAP successfactors
6 -
SAP SuccessFactors OData API
2 -
SAP Workzone
1 -
SAP-PAYROLL
1 -
self-service migration
1 -
sftp
1 -
SFTP scenario
1 -
Skills
1 -
Skills Management
1 -
sso deeplink
1 -
Stories in People Analytics
3 -
Story Report
1 -
SuccessFactors
3 -
SuccessFactors Employee central home page customization.
1 -
SuccessFactors Onboarding
1 -
successfactors onboarding i9
1 -
SuccessFactors Platform
1 -
Table Report
1 -
talent
1 -
Talent Intelligence Hub
2 -
talentintelligencehub
1 -
talents
1 -
Tax
1 -
Tax Integration
1 -
TIH
1 -
Time Accounts
1 -
Time Management implementation links
1 -
Workflows
1 -
XML Rules
1
- « Previous
- Next »
Related Content
- Accessing and Using Standard SAP Content in Human Capital Management Blogs by SAP
- Export and Import Feature of SAP SuccessFactors Talent Intelligence Hub in Human Capital Management Blogs by SAP
- SAP Companion question mark missing in Manager in Human Capital Management Q&A
- SAP Enable Now Information Sessions - Previous Webinar Recordings in Human Capital Management Blogs by SAP
- User is not Able to view the assets I created using SAP Companion for Desktop in Human Capital Management Q&A
Top kudoed authors
| User | Count |
|---|---|
| 5 | |
| 3 | |
| 2 | |
| 2 | |
| 2 | |
| 1 | |
| 1 | |
| 1 | |
| 1 | |
| 1 |