
- SAP Community
- Products and Technology
- Financial Management
- Financial Management Blogs by Members
- SAP BPC 7.5 Environment Migration to 10.1.
Financial Management Blogs by Members
Dive into a treasure trove of SAP financial management wisdom shared by a vibrant community of bloggers. Submit a blog post of your own to share knowledge.
Turn on suggestions
Auto-suggest helps you quickly narrow down your search results by suggesting possible matches as you type.
Showing results for
former_member46
Explorer
Options
- Subscribe to RSS Feed
- Mark as New
- Mark as Read
- Bookmark
- Subscribe
- Printer Friendly Page
- Report Inappropriate Content
08-01-2017
8:12 AM
1. Introduction:
After fully research and 2 real time migration, were able to consolidate all the issues and steps
which can come during migration of a 7.5 environment to 10.1 BPC version.
This blog gives Step by Step real time experienced guide with screenshots of all the required
information to complete SAP BPC 7.5 Appset migration.
Existing System Configuration: SAP BPC 7.5 NW
After Upgrade Configuration: SAP BPC 10.1 NW SP 10
Pre-requisite, all Upgrade activities should be completed. Example, after upgrade our system
would be BW 7.4 and BPC 10.1 Std.
Then, we can perform below steps to proceed for Appset migration. (** Upgrade doesn't
mean that migration is done, we need to follow further steps to complete migration of 7.5
Appset.)
2. Activating components in SICF

2.1. Example: Activate /sap/EPM_BPC
as per below screen shot: Go to T-code: SICF, open the path as mentioned.

One by One activate all the mentioned components.
3. Prerequisites to proceed further steps:
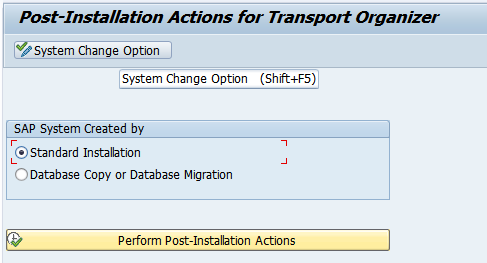
3.1 Tcode- SCC4 System changeability
Check for the system it should NOT set on “No changes allowed”.

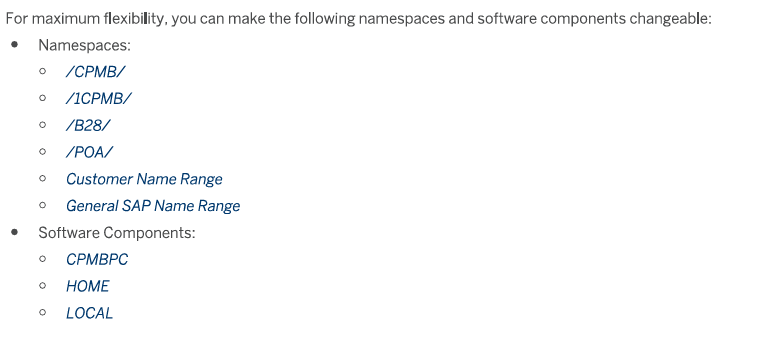
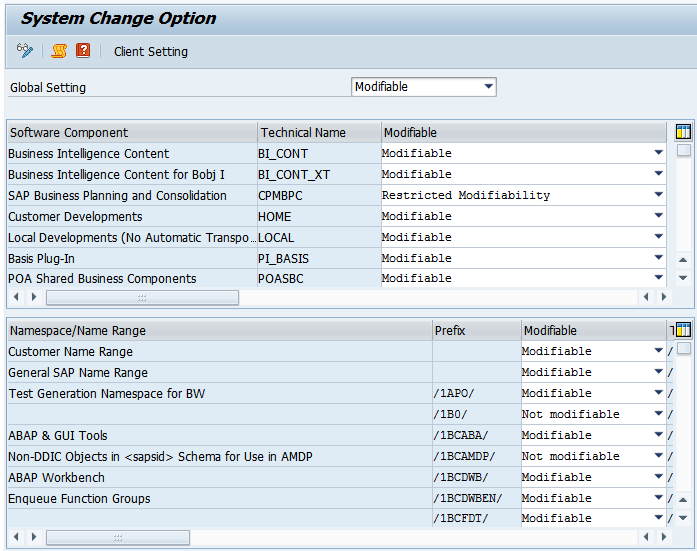
3.2. Make namespace and software components changeable :
Tcode: SE06
Make sure that planning and consolidation Addon is set to “Restricted modifiability”.
***Once system is ready "Production" please change the below settings.***

3.3. Authorization for installation User:
Assign Roles to the USER ID which would install Environment shell
- SAP_BW_CONTENT_ADMIN ( To activate the BI contents)
- SAP_ALL (Remove this once installation done)
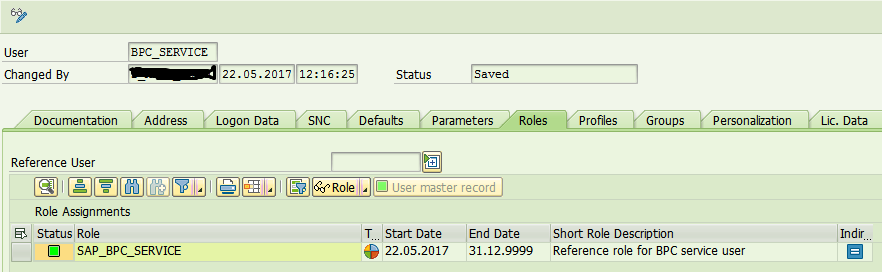
3.4. Create a “Service USER ID” to perform processing Jobs:
SU01-> Create the USER ID (“BPC_SERVICE”)
Role-> SAP_BPC_SERVICE
3.5. Create Assign BPC RFC Destination:
Go To SM59 , create RFC Destination to point to the client on which BPC is installed.


Connection Type-> Abap connection
Communication type -> Unicode.
Check the connection test.
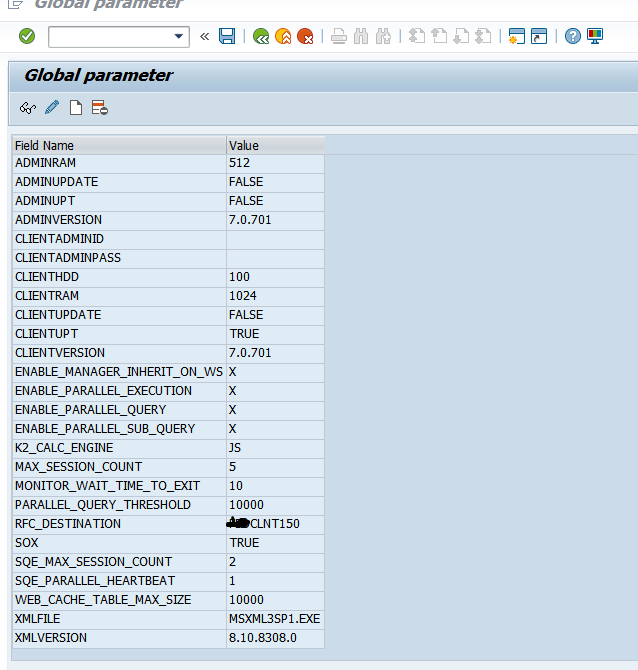
3.6. Set the parameters:
Go to SPRO-> SAP Reference IMG-> Planning and Consolidation -> Configuration Parameters-> Set Global Parameters-> Execute
Add New Item-> “RFC_DESTINATION” which u have created in SM59. Save the changes.
Now all Prerequisites completed and we can go ahead with further process.
4. Activate BI Content:
Procedure:
1. Go to Transaction RSA1 and select BI content.
2. Choose Object Types.
3. Expand the Info object and select the object.
4. Give 0TCA* to find the objects.
5. Ensure that all the objects are active. If not than install them to activate.

6. As presently all the *TCA objects are already activated so, taking some other object
to show how can we install any object.
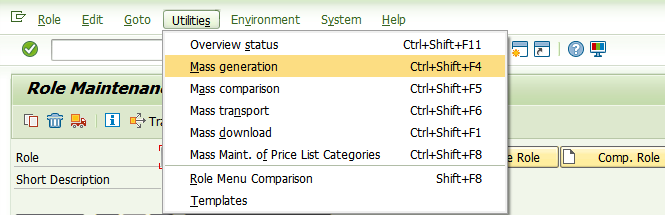
5. Generate required authorization profiles and perform user mass comparison.
Procedure:
1) T code: PFCG
2) Utilities-> Mass Generation.
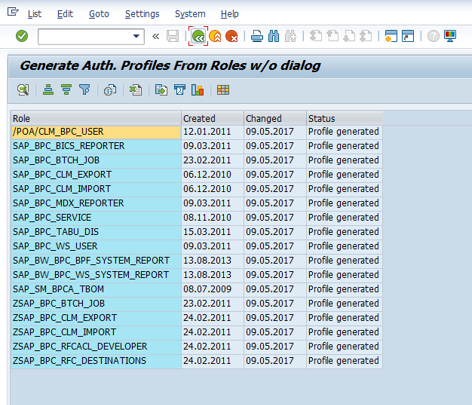
4). Give *BPC* to filter the roles.
5). Choose all roles and select Generate automatically.
6). Execute the program.
7). Come out to PFCG.

After completion below status will appear.
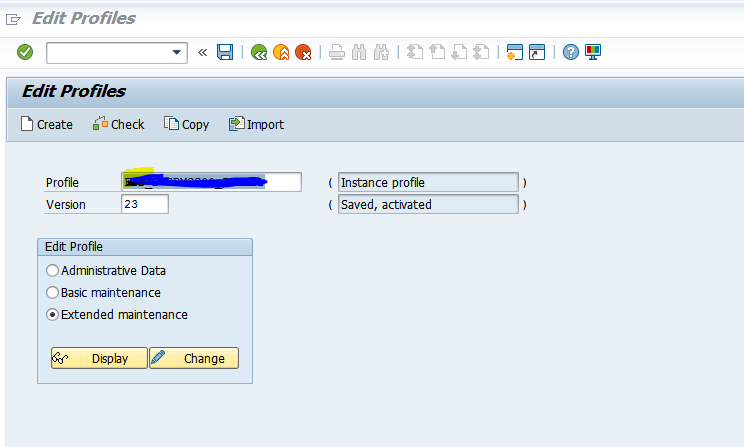
6. Compare the roles :
1) Again go to PFCG. Choose Utilities -> Mass comparison.
2) In selection of roles , use *BPC* and execute the program.
3) Execute the program.
4) Close PFCG
5) On bottom of the screen message will appear.

7. Activate Environment Shell:
7.1. Check the Abap buffer size:
Before proceeding the Activation of environment shell, please increase the buffer size through
RZ10. abap/buffersize make it at-least 2 GB.
RZ10:
Display for extended maintenance.
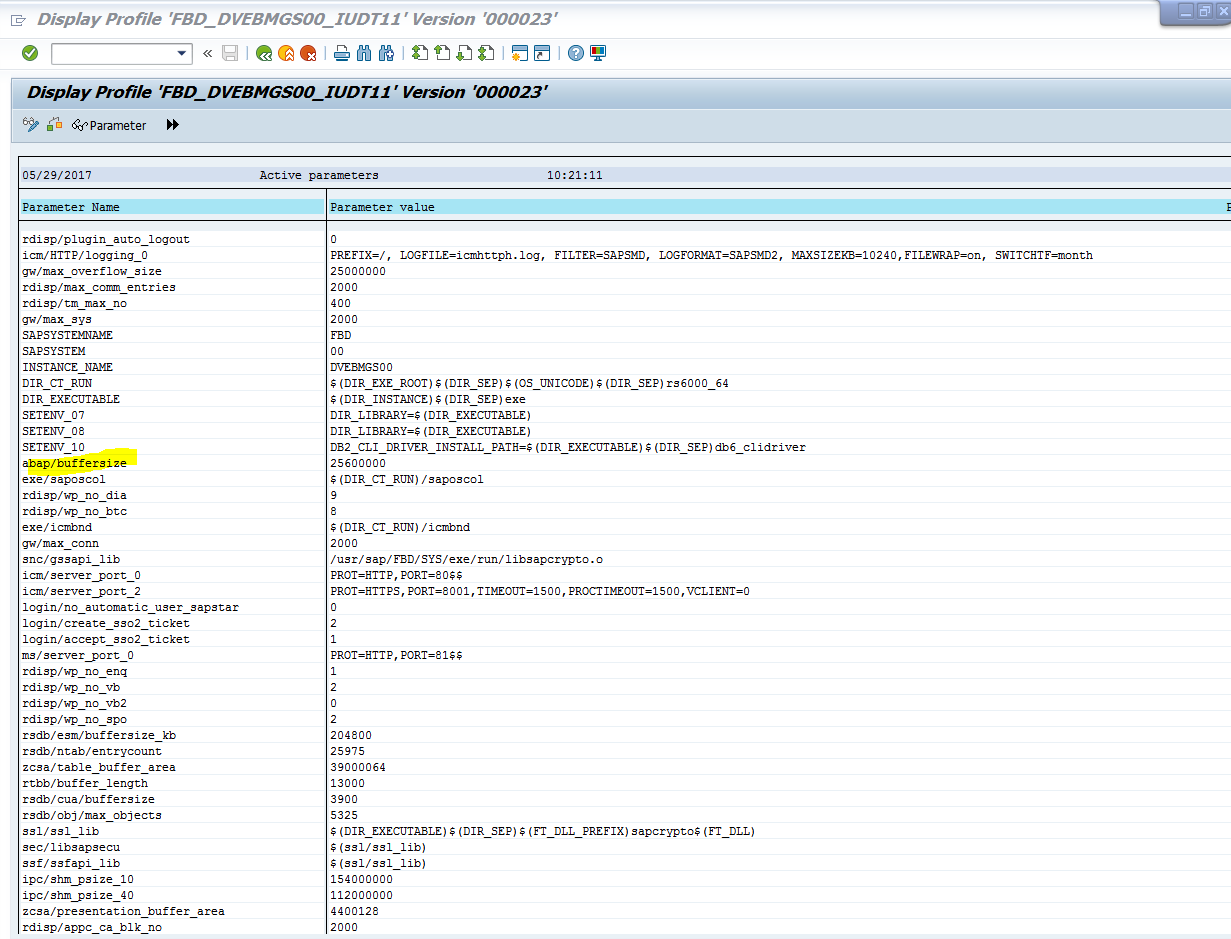
Once buffer size updated it will minimize the risk of timeout during “UJS_ACTIVATE_CONTENT” program.
7.2. Activation of Environment Shell:
Steps: SE38-> UJS_ACTIVATE_CONTENT-> Execute


8. Migration of 7.5 Environment:
Assume the Appset Name is “XYZ_BUDGET”

Give the Environment name and the CSV file path which is stored in on local desktop. Make a
dummy file for users and Teams and save on desktop. To copy teams,users,data access profile
and task profiles its required to give the path to security mapping file.

Successfully completed.


9. Check the data through UJA_DATA_CHECKER Program.
SE38-> UJA_DATA_CHECKER

10. Generate the admin Link from SICF
SICF-> Default host.

Test external alias as given path.
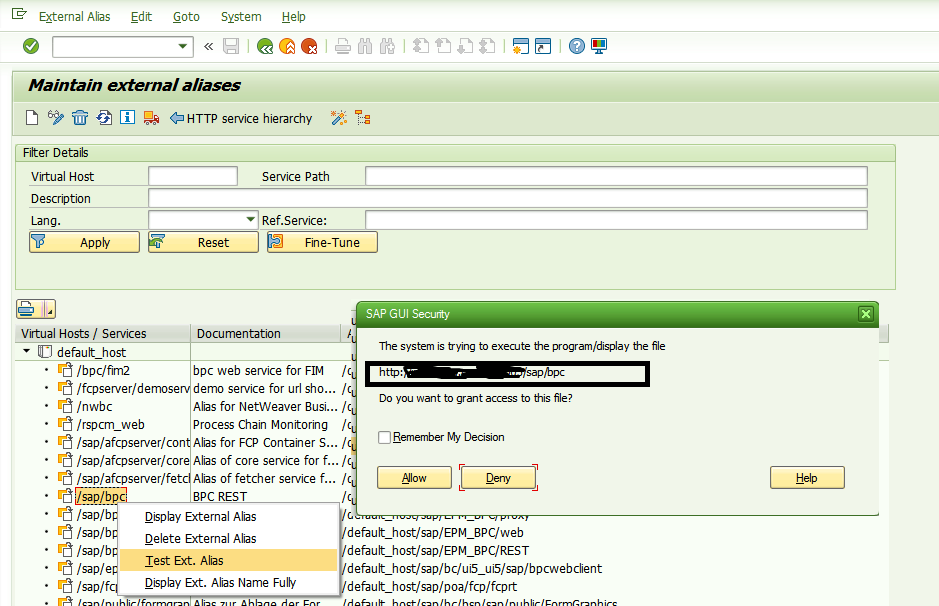

After giving user ID and Password (BW user ID and Password) below link will open with BPC admin Client.
Regards,
Priyanka
Reference Links:
https://help.sap.com/viewer/p/SAP_BUSINESS_PLANNING_AND_CONSOLIDATION,_VERSION_FOR_SAP_NETWEAVER
Installation Guide for SAP Business Planning and Consolidation 10.1, version for SAP NetWeaver on SA...
- SAP Managed Tags:
- SAP Business Planning and Consolidation, version for SAP NetWeaver
1 Comment
You must be a registered user to add a comment. If you've already registered, sign in. Otherwise, register and sign in.
Labels in this area
-
2023 Upgrade
1 -
Accounting & Financial Close
1 -
Accounting and Financial Close
1 -
Assign Missing Authorization Objects
1 -
Bank Reconciliation Accounts
1 -
CLM
1 -
EAM
1 -
Emergency Access Management
1 -
FFID
1 -
FI-AA
1 -
FIN Asset Management
1 -
FIN-CS
1 -
FINANCE
2 -
GRIR
1 -
Group Reporting
1 -
Invoice Printing Lock
2 -
Mapping of Catalog & Group
1 -
Mapping with User Profile
1 -
matching concept and accounting treatment
1 -
Oil & Gas
1 -
Parameter 4026
1 -
Payment Batch Configurations
1 -
Public Cloud
1 -
Revenue Recognition
1 -
review booklet
1 -
S4 HANA
1 -
S4 HANA 2022
1 -
S4 HANA On-Premise
1 -
S4HANA
1 -
SAP BRIM
1 -
SAP CI
1 -
SAP FICO
1 -
SAP RAR
1 -
SAP S4HANA
1 -
SAP S4HANA Cloud
1 -
SAP S4HANA Cloud for Finance
1 -
SAP Treasury Hedge Accounting
1 -
Z Catalog
1 -
Z Group
1
Related Content
- How Finance teams can steer their businesses today based on financial and sustainability data in Financial Management Blogs by SAP
- SAP PaPM Cloud UM: Introduction to Important Action Buttons in Financial Management Blogs by SAP
- SAP PaPM Cloud: What’s New as of 2024-05-06? in Financial Management Blogs by SAP
- Climate Change Risk Scenario Analysis in SAP PaPM - 1/3: Climate Risk Management Introduction in Financial Management Blogs by SAP
- SAP Multi-Bank Connectivity (MBC) – Meaning-Legacy Application-Payment process in Financial Management Q&A