
Enterprise Resource Planning Blogs by Members
Gain new perspectives and knowledge about enterprise resource planning in blog posts from community members. Share your own comments and ERP insights today!
Turn on suggestions
Auto-suggest helps you quickly narrow down your search results by suggesting possible matches as you type.
Showing results for
VKR_23
Participant
Options
- Subscribe to RSS Feed
- Mark as New
- Mark as Read
- Bookmark
- Subscribe
- Printer Friendly Page
- Report Inappropriate Content
09-07-2023
5:57 AM
SAP Query
SAP Query:
SAP Query is a tool that allows you to create reports even without programming. SAP queries are based on InfoSets – these are the areas that provide special views of a logical database and define which fields of the database can be used in queries. SAP queries can be shared with any users via assigning InfoSets to user groups.
SAP Query – Overview:
- SAP Query is used to create reports for users who have little knowledge about SAP Table data storage structure. SAP Query allows evaluating data in the SAP system.
- SAP Query offers users a broad range of ways to define reporting programs and create different types of reports such as basic lists, statistics, and ranked lists.
Following are the major components which are associated with SAP Query:
- Info Sets – Are based for the Query and it contains one or more database table details.
- Queries – For the User to create and generate the Query.
- User Group – To restrict set of Users for a specific Query plus for Authorizations.
- Quick Viewer – A simple tool for quick report generation.
SAP Query – Creation:
| Creation of Query | SQ01 |
| Creation of Infosets | SQO2 |
| Creation of User Groups | SQ03 |
| Creation of Quick Viewer (User Specific) | SQVI |
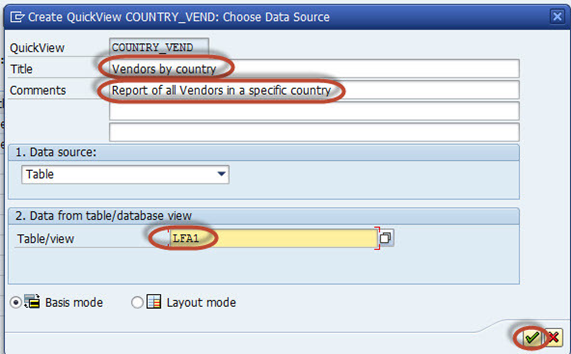
Creation of Quick Viewer: (Transaction code – SQVI)
SQVI is a simple ad-hoc report that can be written directly in the production system, I.e., there is no need for transporting information between systems. Any functional consultant (or even business user) with a good understanding of SAP tables can write a query with SQVI.

Enter the Title for your Report and Enter the Description
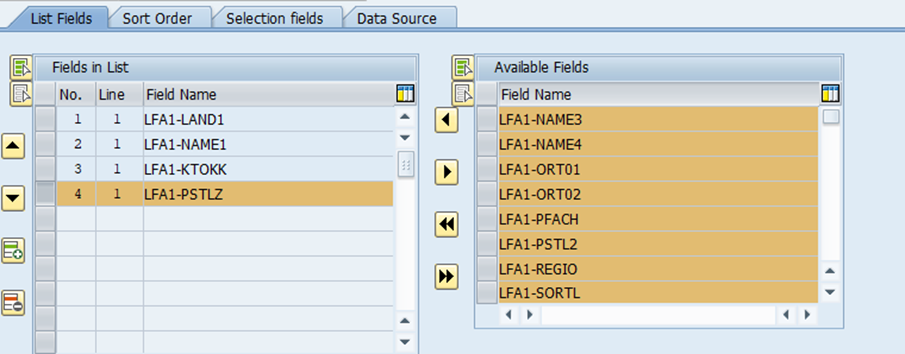
Select on the first tab (List Fields) which fields you want to see in your report. For Example, we select from the right column the fields “Country Key”, “Name 1”, “Vendor Account Group” and “Postal Code” and press the “Arrow to the left”, so these fields are available for the report, by being displayed on the left column.
If you want to see the Field Names in Technical click on the above button as highlight in the picture or else press SHIFT+F5.

Select on the second tab the sort order. Mark the fields you want and choose the desired criteria. In our case we will order the vendor by their names.

On the third tab you must define the selection fields. Choose from the right column the fields you need. You may also change the order in which they may appear later with the transaction.
After Maintaining all the data click on the save button.

After clicking on the save button click on the Execute button.

You will see a screen, like one from a standard program, but with your own description and specifically for the fields you have defined. For our example we select a specific country and press the “Execute” button.

Now we can see the result.

Note:
The Difference between the SQVI and SQ01/SQ02 are the Queries which we are written in SQ02/SQ01 are Transportable. Where in SQVI we directly written the Queries in production system.
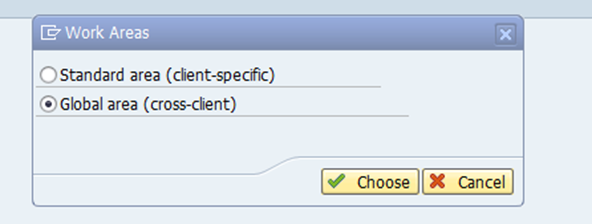
SAP Query – Area:
SAP Query Area is a set of objects having queries, InfoSets and User Groups which are consistent.
Following Query Areas:
- Standard Area – They are Client Specific Queries and do not create a Work Bench Request.
- Global Area – Queries in the Global Area are Client Independent.

SAP databases have several numbers of tables in which the transactions, master data gets stored and it’s practically not feasible to have all such fields for selection when creating a query. Hence before the start of creating a query, InfoSet creation is required.
First create the User Groups in SQ03:
Create a logical set of User Group to which the InfoSet Queries would be assigned.
Enter the Description in the User Group and click on Create button.

Enter the Description and click on the save.

![]()
Now Create the Infosets in SQ02 Transaction Code:
The InfoSet creation can be made with the Combination of Tables (Table Join), Direct read from a Single Table or with the help of Logical Database.
Enter the Description in the InfoSet tab and click on the create button.

Here I am using the tables EKKO and EKPO.
Enter the Description in the Report Tab and Enter the Table Name and click on the Enter or else click on the Tick mark as shown below.

Click on the insert table button to add more tables.

Enter the table Names one by one by clicking on the Insert Table Tab.

If you want to join the tables, you can join by clicking on the Join Conditions Tab.
Here I Join
EKKO with EKPO by clicking on the Join Conditions Button.
After joining the tables click on the back button as shown in the below picture.

Select the Include key fields tab and click on the Enter button or else on Tick mark which is shown below.

Next, we’ll create field groups and add data fields per the requirement.
For our use case, we are not doing an alias table or extras. So, we can just hit the generate option,
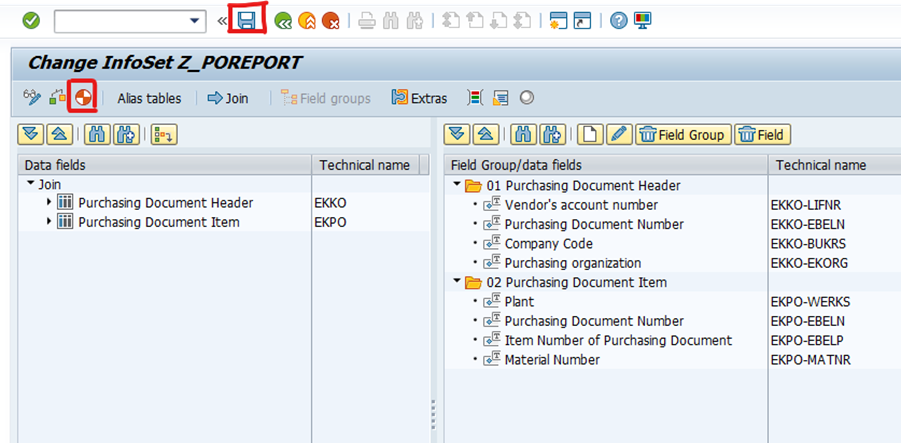

![]()
In the Next step we can assign the Infoset to the Role/User Group Assignment in SQ02 Transaction code.
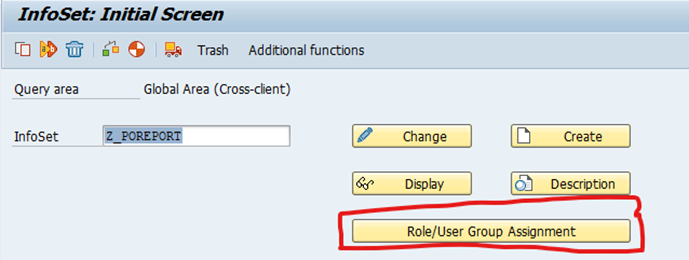
Select the User Group which we are created in the SQ03 Transaction Code. By selecting the User group click on the save Button.
We can assign Z_POREPORT to Z_PODATA.
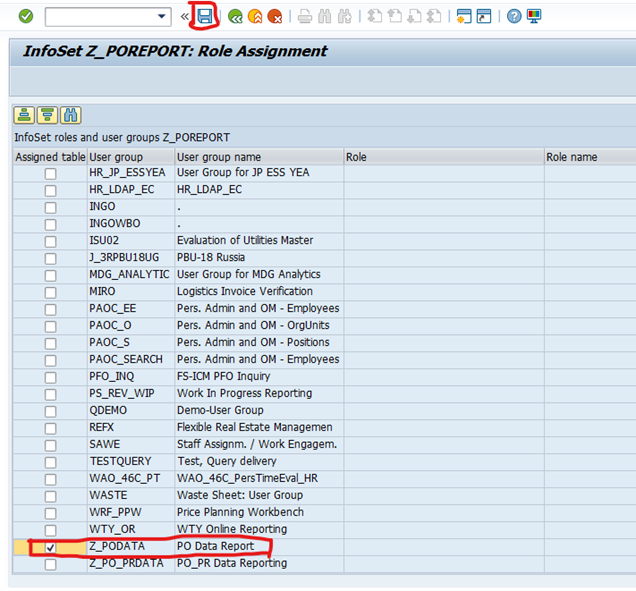
![]()
Click on the Generate Button

![]()
In SQ03 We can Assign Users to InfoSets

Click on the Assign Infoset tab as shown in the picture.
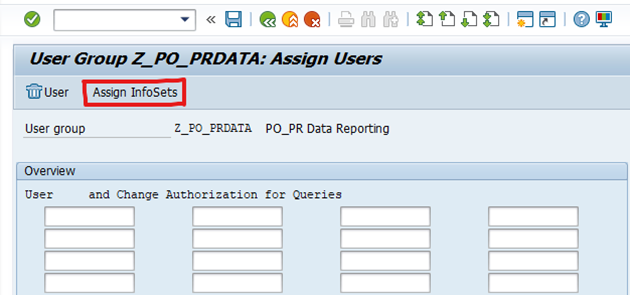
Select the Infoset checkbox and click on the save button.

![]()
Next go to the Transaction Code SQ01, Enter the title in the Query Tab. Here I have entered My user Group as Title Description.
We should have to enter Either Infoset Title or User Group Title as Description in the while creating the Query in the SQ01 then only the system Accepting or else the system throws error User Group does not Exit.
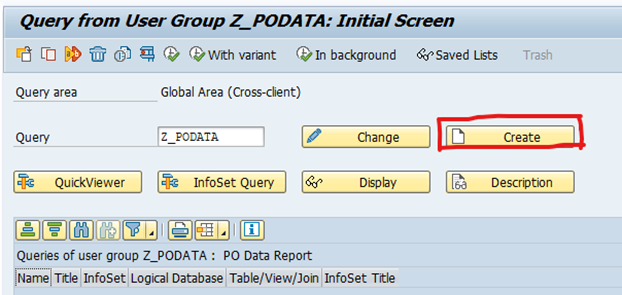
By Entering the Title click on the create button. Select the Infoset that we created and click on the Green Tick mark as shown in the below picture.

Enter the Title Description and click on the Basic list Tab.
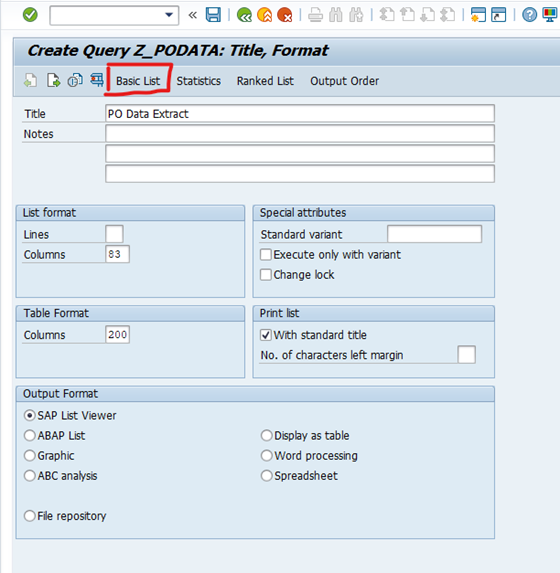
Click on the Enter Button or the Tick mark as shown in the picture.

In the data fields section, choose fields for selection and list (output).
List Fields are the output fields which have to be displayed in the Reporting.
Selection fields are the input fields.
Before clicking on the saving button. We can check whether the scenario is working properly or not by clicking on the Test button.

Here I am running the Testing scenario, Here I am clicking on the Execute button by entering the Company code.
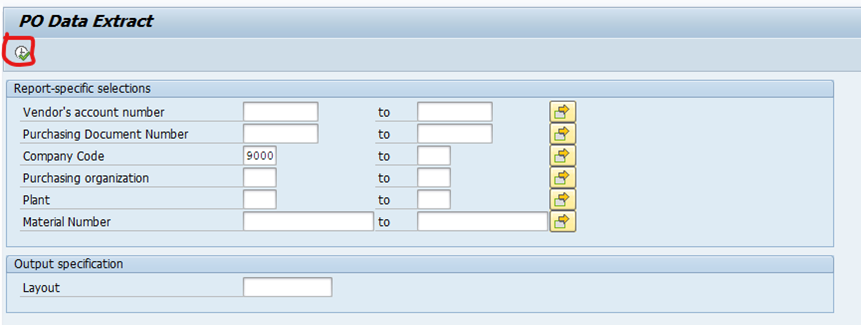
The scenario is working properly.

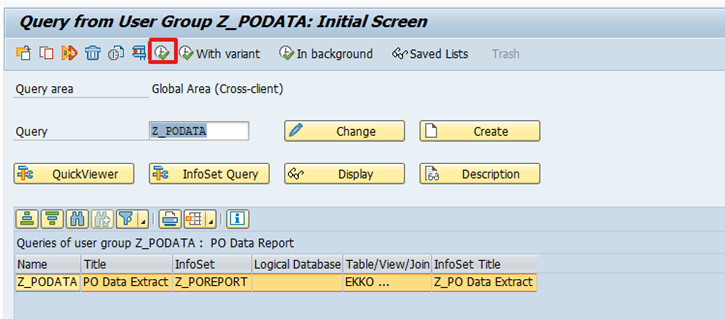
Click on the save button.

Click on the Execute button.
By Entering the company Code click on the Execute Button.
Comparison between and SQ01 and SQVI:
- SQ01 is a saved query that can be accessed by other people, SQVI can only be accessed by the user who wrote the query.
- SQ01 allows for additional fields to be defined and populated, SQVI only allows for the use of fields already defined in the tables.
- SQ01 will automatically bring in text descriptions (such as item description or customer name) when using fields that would have a text field associated, SQVI did not.
Process to Customize the Transaction Code:
For the report we just created, you shouldn’t give end users access to T-codes SQ02 and SQ01. It is not a good user experience to have your business folks play around with these technical transactions.
So, for a complete end-user experience, you should create a report in SQ02/SQ01 and then associate a Z transaction code (custom code) with it. SAP allows you to create these Z transaction codes, which can be used like any other standard transaction code.
To do this, first go to T-code SQ01 and follow this path:
Query > More Functions > Generate Program

Query > More Functions > Display Report Name


Copy the program name.
Next, go to T-code SE93.
Enter a unique transaction code starting with Z, Enter a name in the short text field, select the radio button for “program and selection screen (report transaction).”

Click on the Enter button or the Green Tick Mark after Entering the short text and by selecting the start object.

Enter the programming Name in the Program tab and click on the check button to check whether it contains any Inconsistent or not.
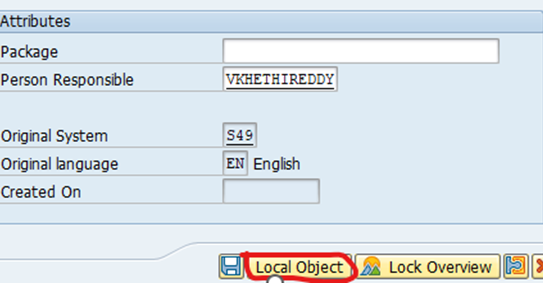
By checking the data, click on the Save Button.

Click on the Local Object.

The customized Transaction code was created successfully.
Enter the Customized Transaction code in Command Bar.

We can get the initial screen directly after Executing the Transaction code.
By Entering the Company Code Click on the Execute Button.
To control the User Authorization, we have to follow the below steps:
- First you have to create the use group in transaction SQ03 and assign the infoset to this user group with transaction SQ02.
- Use the standard authorization object S_Query with transaction SU21 and assign the authorization groups. Now you need to assign to the user profiles or Roles directly so that we can the restrict the users to access the queries and infoset.
- SAP Managed Tags:
- MM (Materials Management),
- MM Inventory Management,
- MM Purchasing
1 Comment
You must be a registered user to add a comment. If you've already registered, sign in. Otherwise, register and sign in.
Labels in this area
-
"mm02"
1 -
A_PurchaseOrderItem additional fields
1 -
ABAP
1 -
ABAP Extensibility
1 -
ACCOSTRATE
1 -
ACDOCP
1 -
Adding your country in SPRO - Project Administration
1 -
Advance Return Management
1 -
AI and RPA in SAP Upgrades
1 -
Approval Workflows
1 -
Ariba
1 -
ARM
1 -
ASN
1 -
Asset Management
1 -
Associations in CDS Views
1 -
auditlog
1 -
Authorization
1 -
Availability date
1 -
Azure Center for SAP Solutions
1 -
AzureSentinel
2 -
Bank
1 -
BAPI_SALESORDER_CREATEFROMDAT2
1 -
BRF+
1 -
BRFPLUS
1 -
Bundled Cloud Services
1 -
business participation
1 -
Business Processes
1 -
CAPM
1 -
Carbon
1 -
Cental Finance
1 -
CFIN
1 -
CFIN Document Splitting
1 -
Cloud ALM
1 -
Cloud Integration
1 -
condition contract management
1 -
Connection - The default connection string cannot be used.
1 -
Custom Table Creation
1 -
Customer Screen in Production Order
1 -
Data Quality Management
1 -
Date required
1 -
Decisions
1 -
desafios4hana
1 -
Developing with SAP Integration Suite
1 -
Direct Outbound Delivery
1 -
DMOVE2S4
1 -
EAM
1 -
EDI
3 -
EDI 850
1 -
EDI 856
1 -
edocument
1 -
EHS Product Structure
1 -
Emergency Access Management
1 -
Energy
1 -
EPC
1 -
Financial Operations
1 -
Find
1 -
FINSSKF
1 -
Fiori
1 -
Flexible Workflow
1 -
Gas
1 -
Gen AI enabled SAP Upgrades
1 -
General
1 -
generate_xlsx_file
1 -
Getting Started
1 -
HomogeneousDMO
1 -
How to add new Fields in the Selection Screen Parameter in FBL1H Tcode
1 -
IDOC
2 -
Integration
1 -
Learning Content
2 -
LogicApps
2 -
low touchproject
1 -
Maintenance
1 -
management
1 -
Material creation
1 -
Material Management
1 -
MD04
1 -
MD61
1 -
methodology
1 -
Microsoft
2 -
MicrosoftSentinel
2 -
Migration
1 -
mm purchasing
1 -
MRP
1 -
MS Teams
2 -
MT940
1 -
Newcomer
1 -
Notifications
1 -
Oil
1 -
open connectors
1 -
Order Change Log
1 -
ORDERS
2 -
OSS Note 390635
1 -
outbound delivery
1 -
outsourcing
1 -
PCE
1 -
Permit to Work
1 -
PIR Consumption Mode
1 -
PIR's
1 -
PIRs
1 -
PIRs Consumption
1 -
PIRs Reduction
1 -
Plan Independent Requirement
1 -
Premium Plus
1 -
pricing
1 -
Primavera P6
1 -
Process Excellence
1 -
Process Management
1 -
Process Order Change Log
1 -
Process purchase requisitions
1 -
Product Information
1 -
Production Order Change Log
1 -
purchase order
1 -
Purchase requisition
1 -
Purchasing Lead Time
1 -
Redwood for SAP Job execution Setup
1 -
RISE with SAP
1 -
RisewithSAP
1 -
Rizing
1 -
S4 Cost Center Planning
1 -
S4 HANA
1 -
S4HANA
3 -
Sales and Distribution
1 -
Sales Commission
1 -
sales order
1 -
SAP
2 -
SAP Best Practices
1 -
SAP Build
1 -
SAP Build apps
1 -
SAP Cloud ALM
1 -
SAP Data Quality Management
1 -
SAP Maintenance resource scheduling
2 -
SAP Note 390635
1 -
SAP S4HANA
2 -
SAP S4HANA Cloud private edition
1 -
SAP Upgrade Automation
1 -
SAP WCM
1 -
SAP Work Clearance Management
1 -
Schedule Agreement
1 -
SDM
1 -
security
2 -
Settlement Management
1 -
soar
2 -
Sourcing and Procurement
1 -
SSIS
1 -
SU01
1 -
SUM2.0SP17
1 -
SUMDMO
1 -
Teams
2 -
User Administration
1 -
User Participation
1 -
Utilities
1 -
va01
1 -
vendor
1 -
vl01n
1 -
vl02n
1 -
WCM
1 -
X12 850
1 -
xlsx_file_abap
1 -
YTD|MTD|QTD in CDs views using Date Function
1
- « Previous
- Next »
Related Content
- Query with Parameter failing in Enterprise Resource Planning Q&A
- Eliminating Formatted search in Enterprise Resource Planning Q&A
- SAP S4HANA Cloud Public Edition Logistics FAQ in Enterprise Resource Planning Blogs by SAP
- Borrar búsqueda formateada in Enterprise Resource Planning Q&A
- Change material cost in Sales return process during PGR in Enterprise Resource Planning Q&A
Top kudoed authors
| User | Count |
|---|---|
| 9 | |
| 4 | |
| 2 | |
| 2 | |
| 2 | |
| 2 | |
| 1 | |
| 1 | |
| 1 | |
| 1 |